> ## Documentation Index
> Fetch the complete documentation index at: https://otoyinc.mintlify.site/llms.txt
> Use this file to discover all available pages before exploring further.
# Register Your Node
> This guide walks you through registering your machine as a Node on Dispersed.
Once [**prerequisites**](/node-operators/prequisites) are installed, proceed to register your machine with the network.
Visit your Dispersed console to generate a secret and public key as these will be requested on first run and then saved in the registry for subsequent runs.
On all platforms you can provide them via env vars "**DISNET\_PUBKEY**" and "**DISNET\_SECRET**", commandline --pubkey and --secretkey or config file (dotfile)
* Windows: AppData\Roaming\Otoy\config
* \* Linux: \~/.Otoy/config
* \* MacOS: \~/.Otoy/config
```text theme={null}
PUBKEY=************
SECRET=************
```
Note: Starting from v1.8.1 the config location was updated. The folder name was changed from `~/.otoy` to `~/.Otoy` on Linux and macOS, and the config file (dotfile) was renamed from `zernet` to `config`.
Precedence is commandline > env var > dotfile.
### 1. Download disNet
Download `disNet` from the [Dispersed Console](https://console.dispersed.com) or contact support for access.
 ### 2. Run Registration
Navigate to the directory with the `disNet` client binary and register using your API Key:
**2.1 Find and navigate to the `disNet` client binary:**
```bash theme={null}
cd /path/to/folder/with/disNet
```
**2.2 Register (first time only):**
```bash theme={null}
./disNet --register --pubkey pk_your_public_key --secretkey sk_your_secret_key
```
Expected output:
```text theme={null}
Registration successful. Node UUID: xxxxxxxx-xxxx-xxxx-xxxx-xxxxxxxxxxxx
```
The new node should appear in the Dashboard page of the Dispersed Console. You can have multiple nodes.
### 3. Start the disNet client
After registration, start the client normally:
```bash theme={null}
./disNet --pubkey pk_your_public_key --secretkey sk_your_secret_key
```
You only need the `--register` flag on first run. After that, just use `--pubkey` and `--secretkey`.
...
### 1. Download disNet
Download `disNet` from the Dispersed Console or contact support for access.
### 2. Run Registration
Navigate to the directory with the `disNet` client binary and register using your API Key:
**2.1 Find and navigate to the `disNet` client binary:**
```bash theme={null}
cd /path/to/folder/with/disNet
```
**2.2 Register (first time only):**
```bash theme={null}
./disNet --register --pubkey pk_your_public_key --secretkey sk_your_secret_key
```
Expected output:
```text theme={null}
Registration successful. Node UUID: xxxxxxxx-xxxx-xxxx-xxxx-xxxxxxxxxxxx
```
The new node should appear in the Dashboard page of the Dispersed Console. You can have multiple nodes.
### 3. Start the disNet client
After registration, start the client normally:
```bash theme={null}
./disNet --pubkey pk_your_public_key --secretkey sk_your_secret_key
```
You only need the `--register` flag on first run. After that, just use `--pubkey` and `--secretkey`.
...
### 1. Download disNet
Download `disNet` from the Dispersed Console or contact support for access.
 ### 2. Run disNet
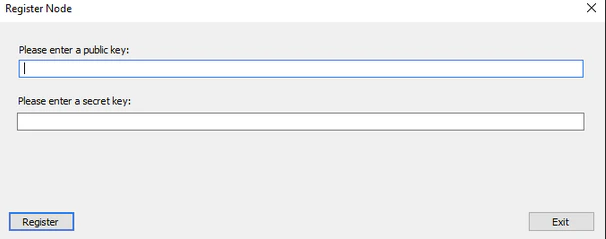
Registration on windows is done automatically. Simply double click disNet.exe, on first run a dialog box will ask for your pubkey and secretkey, this will be saved and used in subsequent runs.
### 2. Run disNet
Registration on windows is done automatically. Simply double click disNet.exe, on first run a dialog box will ask for your pubkey and secretkey, this will be saved and used in subsequent runs.
 disNet can also be run from the commandline in the same way as the Linux version is, this is useful if you want to specify a quota.
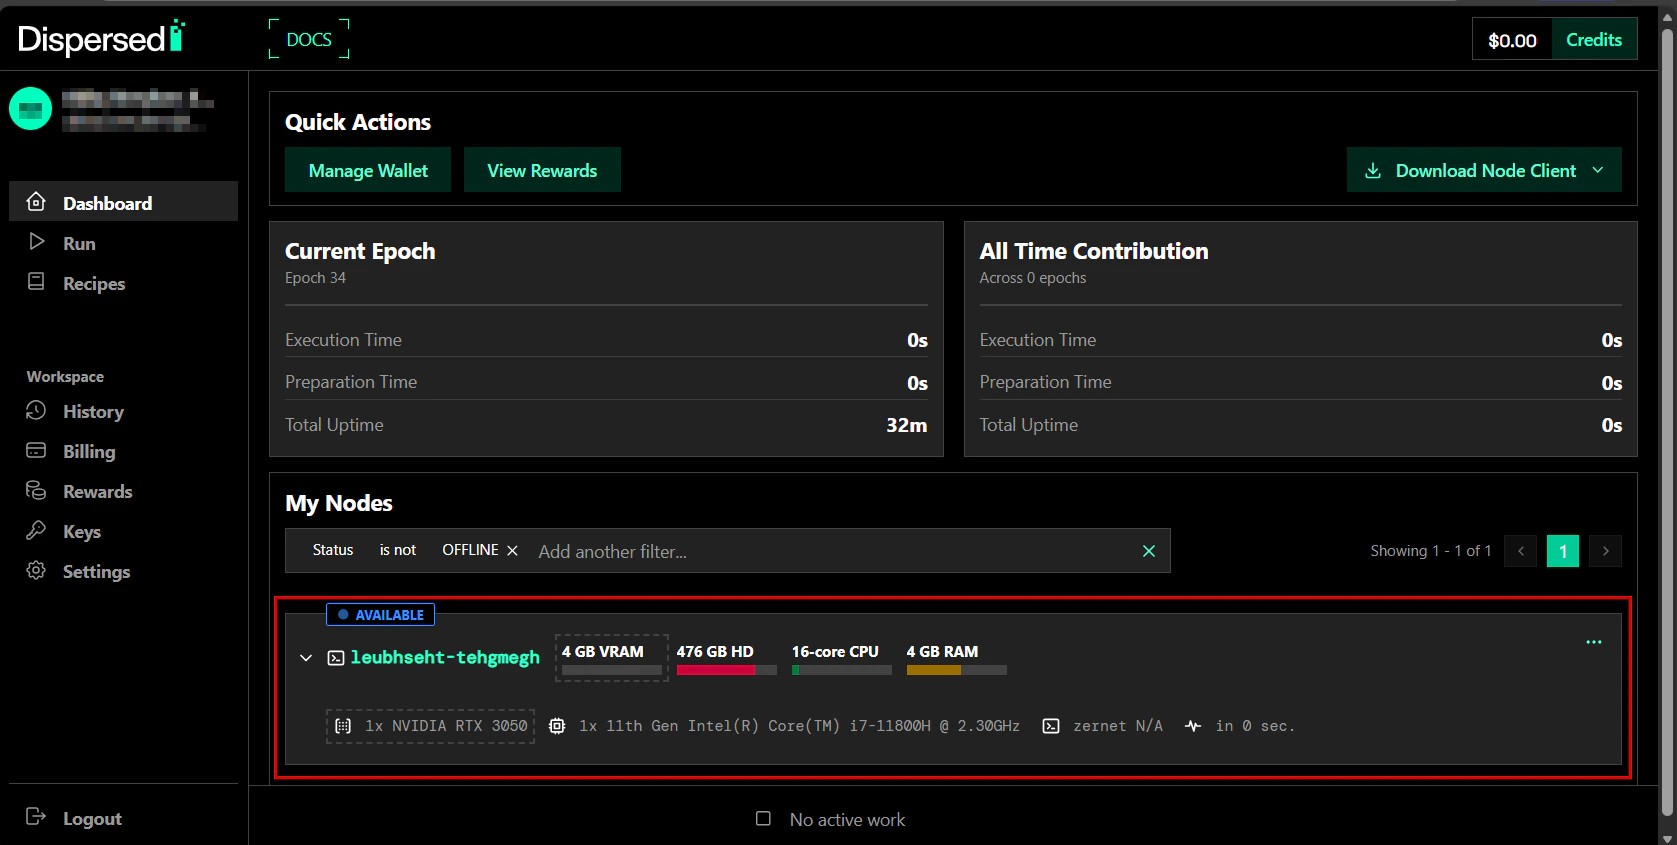
You should be able to see your node on the Dispersed Console > Dashboard
disNet can also be run from the commandline in the same way as the Linux version is, this is useful if you want to specify a quota.
You should be able to see your node on the Dispersed Console > Dashboard
 ***
## Troubleshooting
| Issue | Solution |
| ----------------------------- | ----------------------------------------------- |
| `nvidia-smi` not found | Install NVIDIA drivers |
| Docker permission denied | Run with `sudo` or add user to `docker` group |
| Container can't access GPU | Verify `nvidia-container-toolkit` installation |
| Node not appearing in Console | Check network connectivity and API key validity |
See [Troubleshooting](/troubleshooting) for more common issues.
***
## Troubleshooting
| Issue | Solution |
| ----------------------------- | ----------------------------------------------- |
| `nvidia-smi` not found | Install NVIDIA drivers |
| Docker permission denied | Run with `sudo` or add user to `docker` group |
| Container can't access GPU | Verify `nvidia-container-toolkit` installation |
| Node not appearing in Console | Check network connectivity and API key validity |
See [Troubleshooting](/troubleshooting) for more common issues.