> ## Documentation Index
> Fetch the complete documentation index at: https://otoyinc.mintlify.site/llms.txt
> Use this file to discover all available pages before exploring further.
# Prequisites
> This guide walks you through installing prerequisites prior to registering your machine as a Node on Dispersed.
The Dispersed client (`DisNet`) is a **zero-trust** client. Jobs can access anything your computer can access over the network or disk. We **strongly recommend** using an [**Isolated Network** or **DMZ**](/isolated-networks-or-dmz).
### Supported Systems
The Dispersed client (`disNet`) is built and tested on **Ubuntu 22.04** and **Ubuntu 24.04**. Other Linux distributions may work but are not officially supported.
### 1. Verify NVIDIA GPU Drivers
Ensure your NVIDIA GPU drivers are installed:
```bash theme={null}
nvidia-smi
```
If the command fails, install drivers from [NVIDIA Drivers](https://www.nvidia.com/en-us/drivers/).
### 2. Verify NVIDIA CUDA Toolkit
Check that CUDA is installed:
```bash theme={null}
nvcc --version
```
If not installed, follow the [NVIDIA CUDA Toolkit installation guide](https://developer.nvidia.com/cuda-downloads).
### 3. Install Docker
**3.1 Add Docker's GPG key:**
```bash theme={null}
curl -fsSL https://download.docker.com/linux/ubuntu/gpg | sudo gpg --dearmor -o /etc/apt/keyrings/docker.gpg
```
**3.2 Set permissions:**
```bash theme={null}
sudo chmod a+r /etc/apt/keyrings/docker.gpg
```
**3.3 Add Docker repository:**
```bash theme={null}
echo "deb [arch=$(dpkg --print-architecture) signed-by=/etc/apt/keyrings/docker.gpg] https://download.docker.com/linux/ubuntu $(. /etc/os-release && echo "$VERSION_CODENAME") stable" | sudo tee /etc/apt/sources.list.d/docker.list > /dev/null
```
**3.4 Update and install:**
```bash theme={null}
sudo apt-get update
sudo apt-get install -y docker-ce docker-ce-cli containerd.io docker-buildx-plugin docker-compose-plugin
```
### 4. Install NVIDIA Container Toolkit
**4.1 Add NVIDIA repository:**
```bash theme={null}
curl -fsSL https://nvidia.github.io/libnvidia-container/gpgkey | sudo gpg --dearmor -o /usr/share/keyrings/nvidia-container-toolkit-keyring.gpg
curl -s -L https://nvidia.github.io/libnvidia-container/stable/deb/nvidia-container-toolkit.list | \
sed 's#deb https://#deb [signed-by=/usr/share/keyrings/nvidia-container-toolkit-keyring.gpg] https://#g' | \
sudo tee /etc/apt/sources.list.d/nvidia-container-toolkit.list
```
**4.2 Update and install:**
```bash theme={null}
sudo apt-get update
sudo apt-get install -y nvidia-container-toolkit
```
**4.3 Configure runtime:**
```bash theme={null}
sudo nvidia-ctk runtime configure --runtime=docker
sudo systemctl restart docker
sudo nvidia-ctk runtime configure --runtime=containerd
sudo systemctl restart containerd
```
### 5. Verify Container GPU Access
```bash theme={null}
sudo docker run --rm --runtime=nvidia --gpus all ubuntu nvidia-smi
```
You should see your GPU information displayed.
### 6. Install OpenGL Libraries (Recommended)
For rendering workloads, install the OpenGL libraries matching your driver version:
**6.1 Check available versions:**
```bash theme={null}
apt-cache search --names-only "libnvidia-gl*"
```
**6.2 Install (replace 550 with your driver version):**
```bash theme={null}
sudo apt-get install -y libnvidia-gl-550
```
You should see your GPU information displayed.
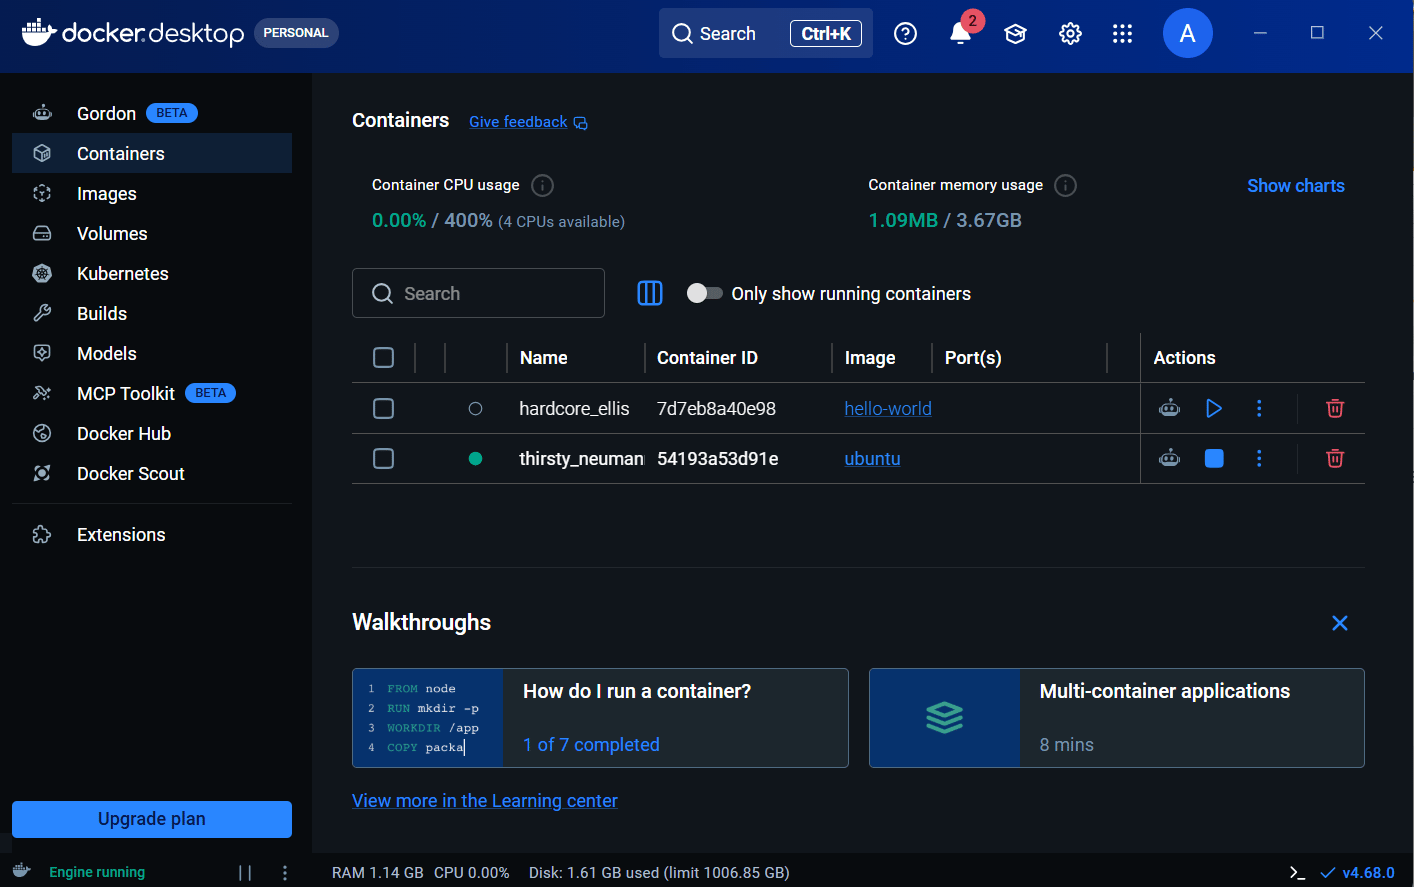
For the windows client you will need WSL2 installed and Docker Desktop. Docker Desktop needs to be running otherwise the client will quit with an error.
### 1. Install WSL2
Details and setup instructions for installing WSL2 are at [https://learn.microsoft.com/en-us/windows/wsl/install](https://learn.microsoft.com/en-us/windows/wsl/install)
Open PowerShell as Administrator:
```powershell theme={null}
wsl --install
```
Follow the prompts to complete the installation and create a user.
WSL assigns only half the RAM on the machine to WSL VMs by default. If you would like to change this amount, refer to [Advanced Settings Configuration](https://learn.microsoft.com/en-us/windows/wsl/wsl-config#configuration-settings-for-wslconfig) in WSL from Microsoft Learn.
### 1. Reboot your computer
After reboot You can find WSL Setup window via the Windows Start Menu.
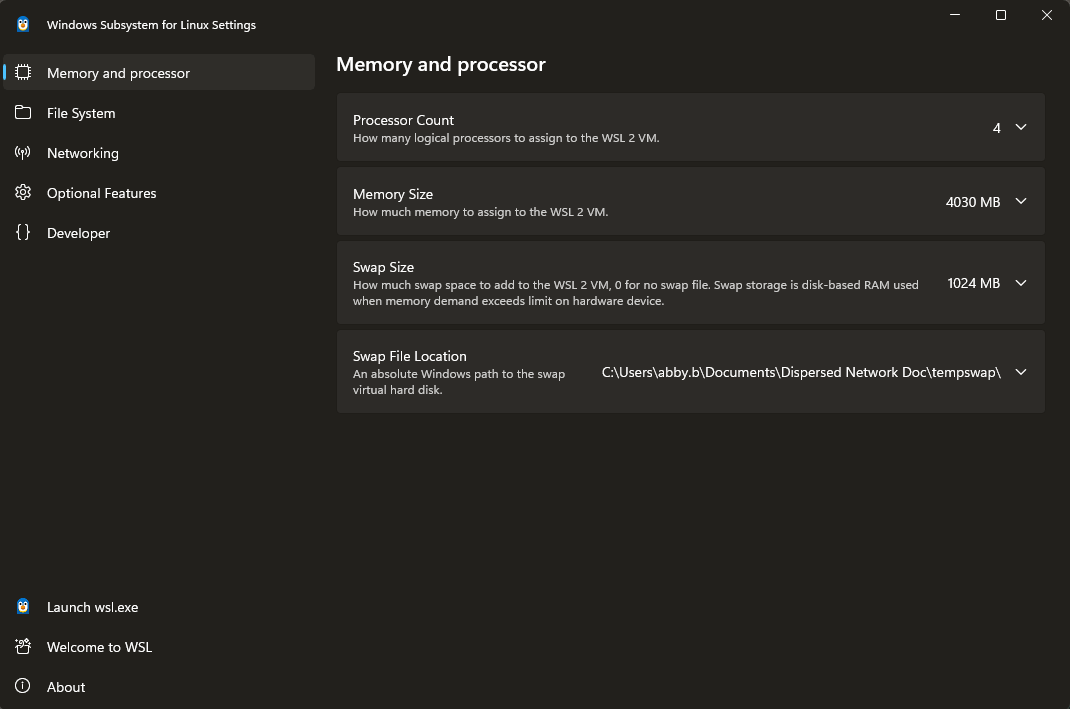 To verify the installed WSL and its version:
```powershell theme={null}
wsl -l -v
```
```powershell theme={null}
wsl --version
```
### 3. Install Docker Desktop
Details and setup instructions for installing WSL2 are at [https://docs.docker.com/desktop/setup/install/windows-install/](https://docs.docker.com/desktop/setup/install/windows-install/)
If your largest disk is not your boot drive, we recommend installing Docker Desktop via the command line. This allows you to specify the largest disk to store docker images. For example:
```powershell theme={null}
"Docker Desktop Installer.exe" install --backend=wsl-2 --always-run-service --wsl-default-data-root=D:\docker
```
Test that docker was installed correctly by invoking a new command window and typing at the prompt:
```powershell theme={null}
docker run hello-world
```
To verify the installed WSL and its version:
```powershell theme={null}
wsl -l -v
```
```powershell theme={null}
wsl --version
```
### 3. Install Docker Desktop
Details and setup instructions for installing WSL2 are at [https://docs.docker.com/desktop/setup/install/windows-install/](https://docs.docker.com/desktop/setup/install/windows-install/)
If your largest disk is not your boot drive, we recommend installing Docker Desktop via the command line. This allows you to specify the largest disk to store docker images. For example:
```powershell theme={null}
"Docker Desktop Installer.exe" install --backend=wsl-2 --always-run-service --wsl-default-data-root=D:\docker
```
Test that docker was installed correctly by invoking a new command window and typing at the prompt:
```powershell theme={null}
docker run hello-world
```
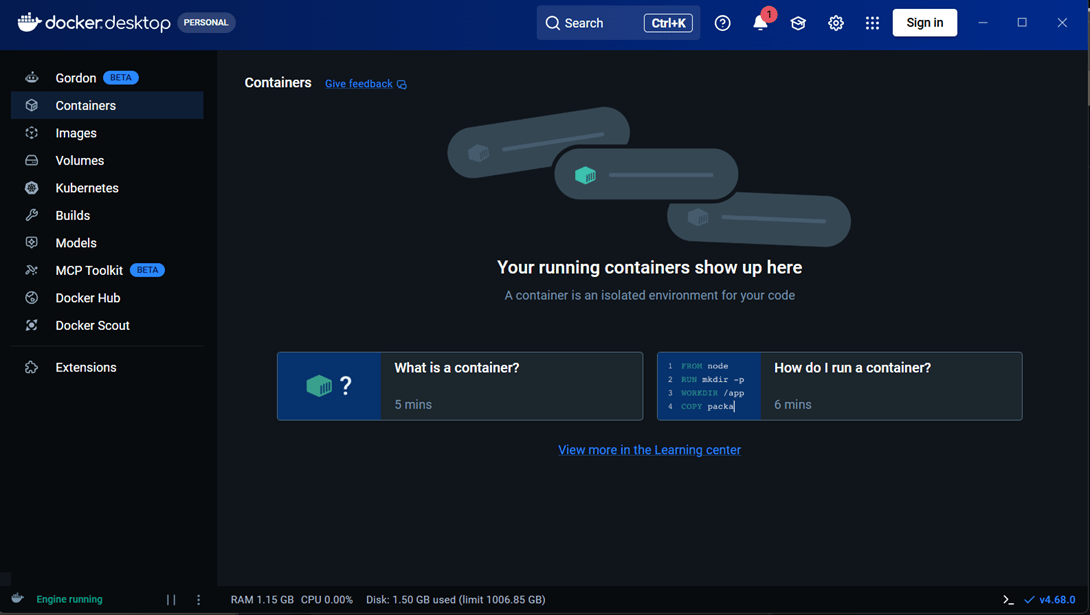 Test that docker was installed correctly by invoking a new command window and typing at the prompt:
```powershell theme={null}
docker run hello-world
```
Test that docker was installed correctly by invoking a new command window and typing at the prompt:
```powershell theme={null}
docker run hello-world
```
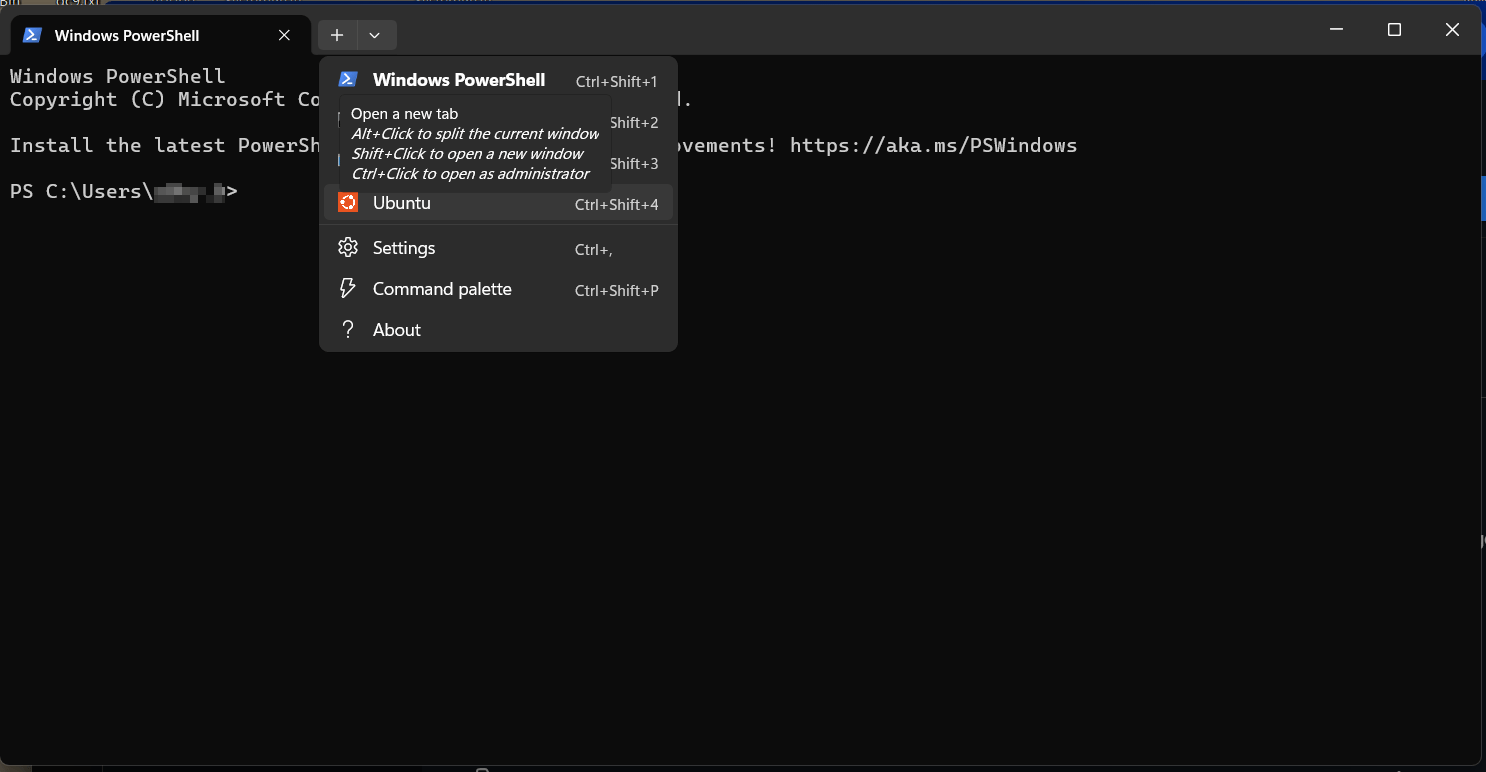
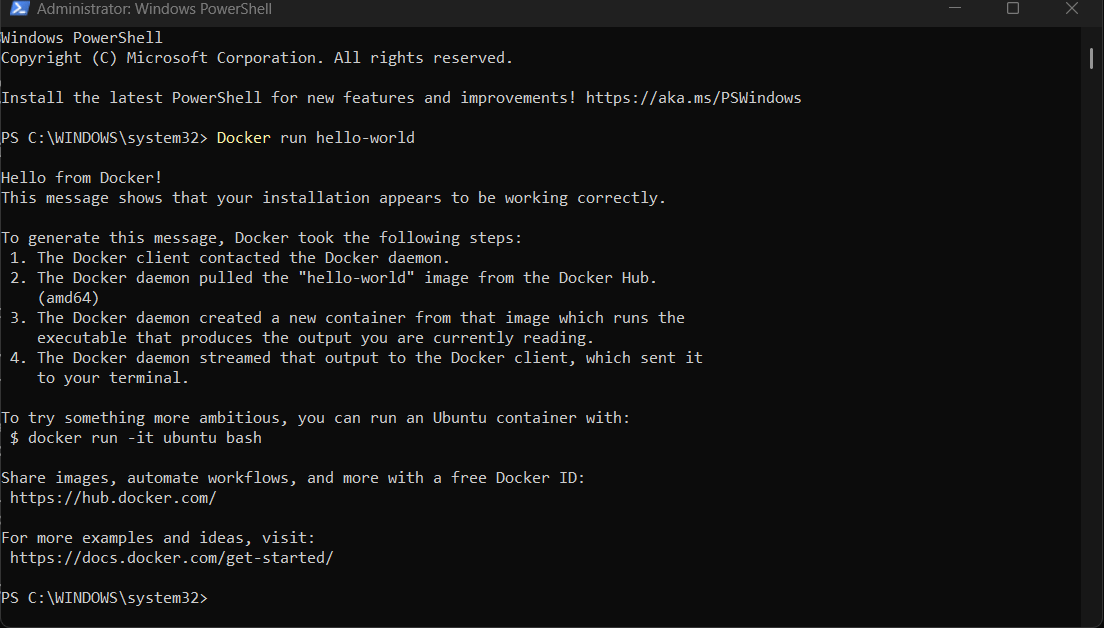 When both WSL and Docker Desktop are successfully installed, you should be able to access your Ubuntu distro from a new terminal window:
 To run a Docker container:
```powershell theme={null}
docker run --rm --runtime=nvidia --gpus all ubuntu nvidia-smi
```
To run a Docker container:
```powershell theme={null}
docker run --rm --runtime=nvidia --gpus all ubuntu nvidia-smi
```
 You can now proceed to registering your node.