> ## Documentation Index
> Fetch the complete documentation index at: https://otoyinc.mintlify.site/llms.txt
> Use this file to discover all available pages before exploring further.
# Launch Your Instance
### Step 1: Select Recipe
1. Sign in to the [Dispersed Console](https://console.dispersed.com)
2. Go to **Run** in the sidebar
3. In the Recipe section, select a **Job Recipe** or customize your own job recipe
4. In the GPU section, choose **Any compatible GPU**
### [](https://otoyinc.mintlify.app/service-consumers/service-consumers-quick-start-job-recipe#step-2-fill-in-inputs)Step 2: Fill in Inputs
In the configuration modal, provide the required inputs:
| Input | Description | Example |
| :----------------- | :------------------------------ | :------------------------------ |
| **SSH Public Key** | Your SSH public key | `ssh-ed25519 AAAA... user@host` |
| **Allowed IPs** | IP addresses allowed to connect | `0.0.0.0/0` (any) |
### [](https://otoyinc.mintlify.app/service-consumers/service-consumers-quick-start-job-recipe#step-3-submit)Step 3: Submit
Click **Submit Job**. You’ll be redirected to the **Job Detail** page.
### Step 4: Wait for Node Assignment
After submitting, your Job goes through these stages:
| Status | Description |
| :----------- | :------------------------------------------------------- |
| **PENDING** | The network is searching for a Node with your specs |
| **ASSIGNED** | A Node has been selected and is preparing your container |
| **RUNNING** | Your container is running and ready for connections |
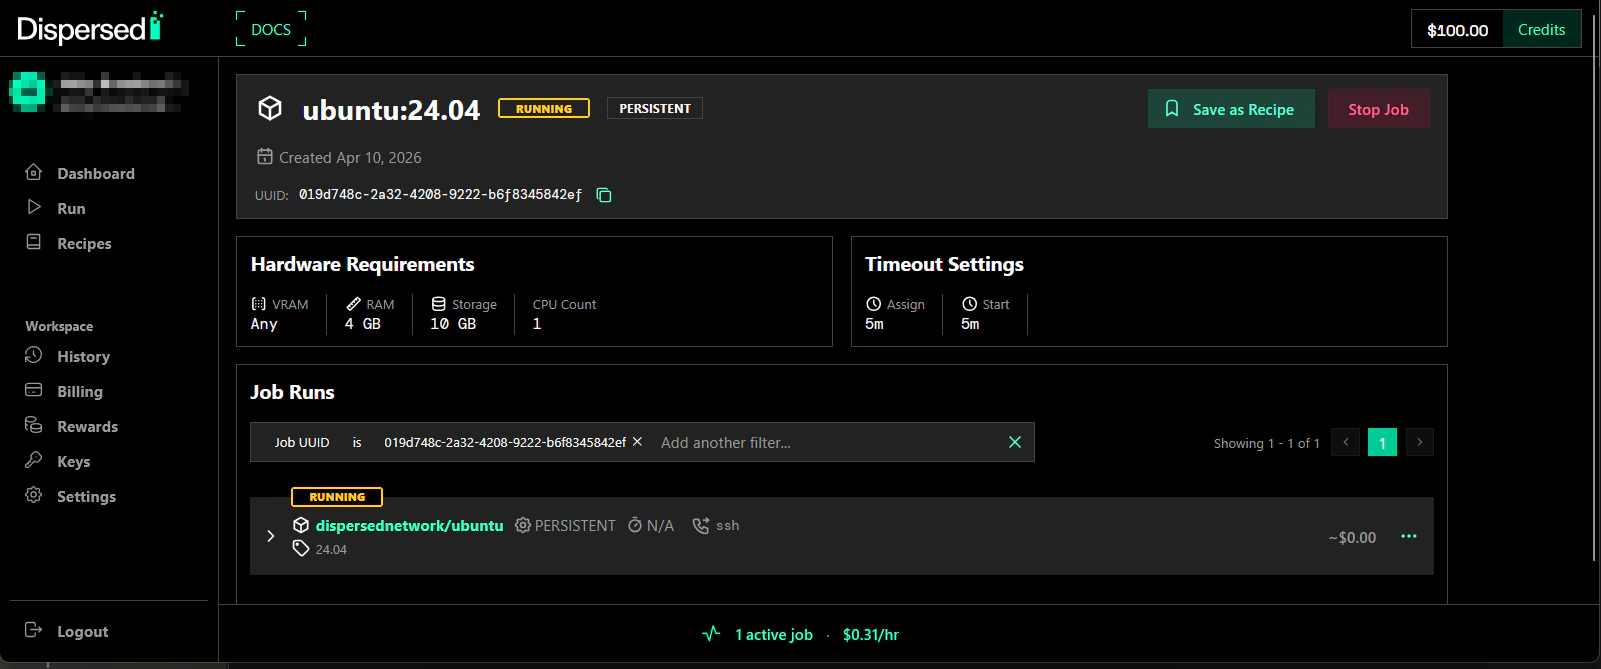
Once a Node is assigned, a **Job Run** is automatically created. This may take a few seconds to a few minutes depending on network availability.
 ### Step 5: Get Connection
When your Job shows **RUNNING**:
1. On the Job Detail page, find the **Job Runs** section
2. Click on the Job Run to open the **Job Run Detail** page
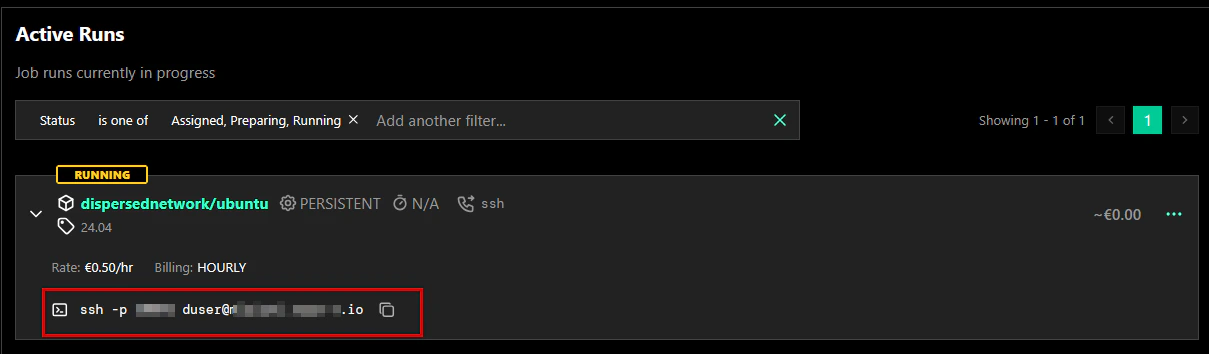
3. The connection information appears under **Node URLs**
You’ll see the `hostname` and `port` needed for SSH access.
### Step 5: Get Connection
When your Job shows **RUNNING**:
1. On the Job Detail page, find the **Job Runs** section
2. Click on the Job Run to open the **Job Run Detail** page
3. The connection information appears under **Node URLs**
You’ll see the `hostname` and `port` needed for SSH access.
 ### Step 6: Connect
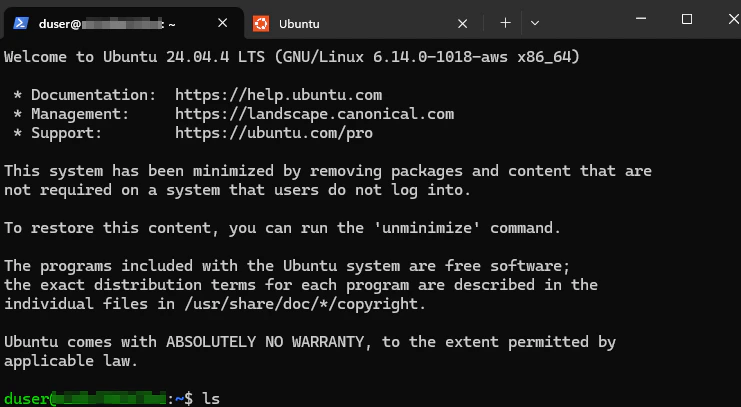
Use the connection info from the Job Run Detail page:
```shellscript theme={null}
ssh -i ~/.ssh/dispersed -p duser@
```
### Step 6: Connect
Use the connection info from the Job Run Detail page:
```shellscript theme={null}
ssh -i ~/.ssh/dispersed -p duser@
```
 The Job Run page updates automatically as status changes. Refresh if needed to see the latest connection information.